Did you know the average newborn requires 8-10 diaper changes per day? (We definitely used more!) That’s a lot of time spent changing diapers! But diaper changes shouldn’t be stressful or traumatic. Below are 12 diaper changing secrets and hacks to turn you into a diaper changing ninja in no time! Already at the point of traumatic diaper changes? Below are troubleshooting ideas to help alleviate stressful diaper changes.
This post contains some affiliate links for which I may make a small commission should you choose to make a purchase. Thank you for supporting my family!
Diaper Changing 101: Everything you Must know
1. How often do you need to change a diaper? On average, aim to check/change your baby’s diaper every two hours. Babies will pee A LOT so you don’t need to blow through diapers and change it every time you see a blue line. When it comes to poopy diapers, however, the American Pregnancy Association recommends changing it as soon as possible. This is because the acid content of poop can irritate your baby’s skin and create a greater chance of rash or infection.
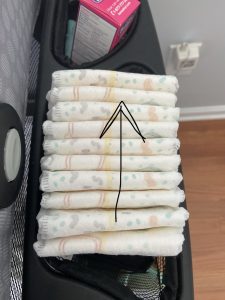
2. Every second matters if your baby hates diaper changes (or is simply impatient). So don’t waste precious time fumbling with the diaper to find the tabs and get it facing the right way. Save time by stocking the diapers so that the front faces away from you. You will be able to pull it out, open it and pop it under your baby’s booty without giving it any thought.
3. Diapers are dummy proof! You may know this line will turn blue when the diaper is wet:
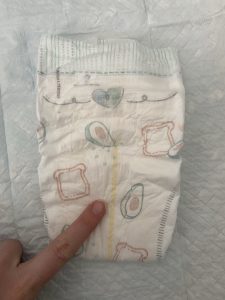
But did you know these markers help you determine when you should size up:
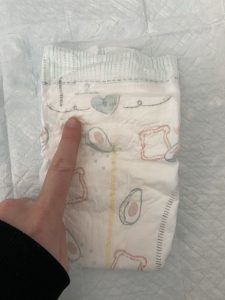
If the tabs are stretching to reach these lines (or your baby is having a bunch of blowouts), it’s time to size up. You can find the size in the upper left corner of the diaper.
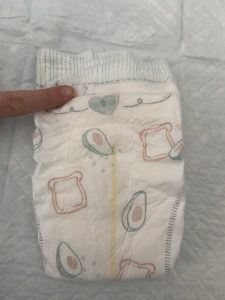
4. The back flap is your friend! Hubs affectionately calls this flap on the back of the diaper the “shit shield.” And for good reason! You can avoid a lot of blowouts up your baby’s back if you remember to check that this flap is lying flat.
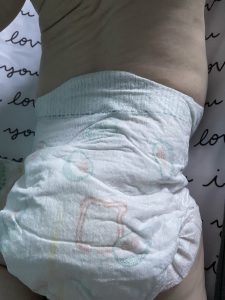
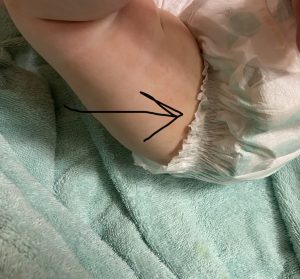
5. You’ll also want to pay attention to these wings. There is an inner stretchy band and this outer set of wings. The inner band should rest against your baby’s skin to lock in the damage. But the outer wings should flare out like this. If they remain tucked in, you’ll be handling a mess later. (True story: I had been tucking them in because I thought they looked better that way! #momfail #functionoverfashion)
Now that you have the Diaper changing basics …
Let’s get to the tricks! Diaper changes will get Much easier when you use the following tips.
6. Start with a well-stocked station. Make sure you have all essentials within arm’s reach so your diaper change is as quick as possible. Diapers and wipes are essential, obviously. Diaper ointment (like this one) will get rid of diaper rash in hours. During a diaper change is also the perfect time to moisturize your baby’s sensitive skin. This cream is always stocked at our station. Other important items include a spare outfit (or three) for blowouts, extra wipes, and socks for the inevitable poop foot situation!
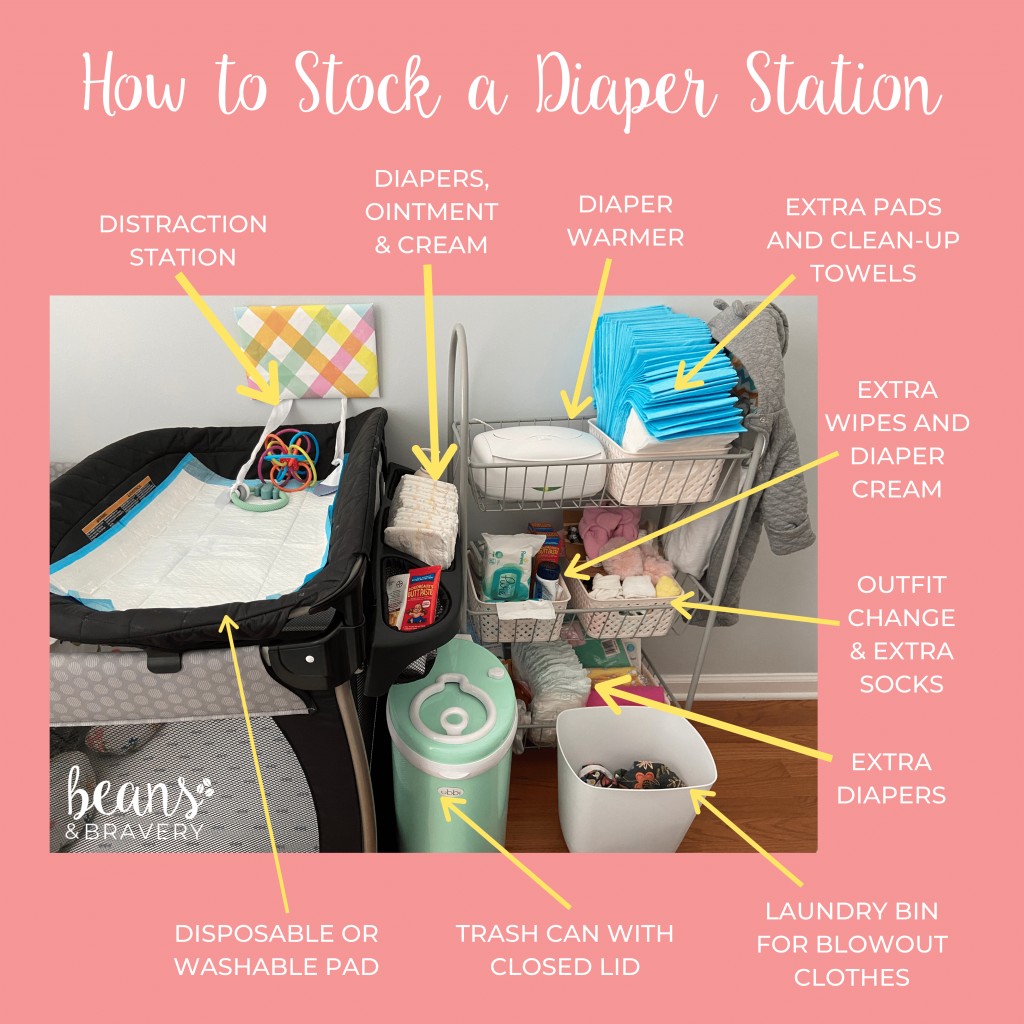
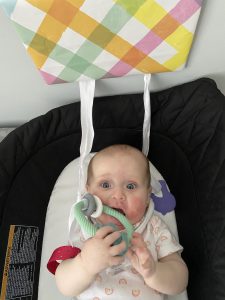
7. Create a distraction station. Once kiddo starts rolling, diaper changes can feel more like an alligator wrestling match. Have a few toys nearby to hand your little one, or create a diaper changing distraction station. In this post I show you how to make this super simple DIY distraction station using items you already have!
8. Establish a diaper change routine. Then, help your baby understand what’s happening or what to expect by narrating what you’re going to do. Babies are a sponge and soak up so much information their first years of life. One way you can make them feel more comfortable is simply by talking or singing to them while you go about the diaper change. Narrate what you’re doing or make up a silly song that goes along with your routine. You’d be surprised how something so simple can put your little one at ease (and dare I say make diaper changing fun).
9. Double up your diapers. (Nope, I don’t mean put two diapers on your baby!) I learned this trick the hard way after dealing with a never ending pooping-while-changing-the-diaper situation that left a mess! Five (yes, FIVE!) diapers later and I was wondering what I had gotten myself into with this little pooping machine. So here’s the trick: Before you undo the old diaper, open and pop your new diaper underneath. Once you’ve wiped the baby down and tossed the wipes into the old diaper, roll it up and wa-lah! The new diaper is already in place and ready to be secured. You’ve removed all opportunities for scoochy baby butt paintings on your changing table.
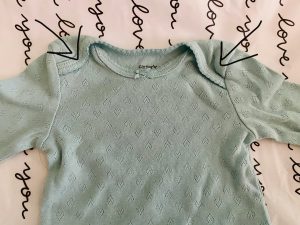
10. Utilize onesie blowout flaps. When you do inevitably have a blowout, these flaps are so you can take the onesie off by pulling it down, instead of over your baby’s head!
11. Size up at night. To encourage longer sleep stretches, you will want to avoid stimulating your baby with extra diaper changes. And when your baby starts sleeping longer stretches, you’ll need a diaper with added capacity. If your baby doesn’t yet fit into overnight diapers, which usually start at size 4, size up your normal day-time diaper one size instead. We love this super inexpensive brand in size 3.
12. Don’t underestimate the power of a wipe warmer. Hubs put up a total stink when I insisted we needed two diaper stations. (We could just walk upstairs to her nursery, he said!) By day three he was not only glad we had the downstairs diaper station, but he suggested we get another wipe warmer! There’s nothing that will wake your baby faster in the middle of the night than a cold wipe on their tush. Wipe warmers are relatively inexpensive and can be multifunctional if you buy one with a built in nightlight. (We have this one and this one. I like the Munchkin one better because it doesn’t need the pillow pads and it doesn’t dry out the wipes.)
Troubleshooting traumatic diaper changes
How to make diaper changes less traumatic
Take a minute and think very specifically about your diaper changes. What part of the diaper change turns traumatic for you or your baby?
Here are common challenges and what you can try to make your diaper change less traumatic.
- Does your baby cry the second you try to put her down? If so, she may not understand what you are doing. Try narrating in a calming voice exactly what you’re going to do (even before you begin to lie her down) and what you’re doing during the diaper change. Babies also thrive on routine so doing the same thing every time will help. Another way you can calm her? Sing to her! Making up a silly song about diaper changes to sing every time you’re about to change her diaper. It make take a few times, but it will turn into a fun way to begin her routine.
- Does she fuss as you undress her? Chances are she is cold! Move your diaper station to a warm location in the house. Near a vent or sunny window are two options. Or, put a heating pad down on the table to warm it up for a minute or two before you (remove it) and place her down. Don’t have a heating pad? Try adding a layer of clothing or using a blanket over your baby so the littlest bit of skin possible is revealed. My favorite onesies for middle-of-the-night diaper changes are these. They zip open from the foot so you’re not exposing so much skin. High socks underneath an outfit with pants also will keep your little one warm.
- Does your baby not like being held by the feet? Instead, you can place your hand under her back and support her that way. Roll her from side to side to secure the tab or to pull back down her onesie.
- Is a diaper rash making diaper changes painful? I swear by A&D Ointment. It has cleared our little one’s rash in a matter of hours. You also can soak your little one’s bum in a warm baking soda bath (or sink). Soak for no more than 10 minutes using 2 tablespoons of baking soda up to 3 times daily. If you’re using a diaper paste, you’ll want to make sure the area is dry before applying. Adding paste or ointment to a wet bottom can trap in moisture and prevent the area from breathing. A cream, on the contrary, will dry and allow air to pass through.
- Your baby keeps getting diaper rashes. If this is the case for your little one, there are three common causes. The first common cause is infrequent diaper changes. Try changing diapers more frequently, especially if she is pooping often. The second common cause is an adverse reaction to the chemicals or fragrances found in diapers and wipes. Switching to a brand free of fragrances, parabens and other chemicals such as Pampers Pure or Water Wipes should help if this is the cause. Third, it could be that your baby’s diaper rash is a more serious issue such as a yeast infection. Always consult your doctor if a rash takes longer than two days to clear. If a rash still persists, a more unfortunate cause is food allergies. Skin reactions such as eczema and diaper rashes can be indicative of food allergies, even if a baby is breast or formula fed. Dairy, egg and soy are common allergens, but the good news is most babies grow out of these. The bad news is a breastfed baby’s skin can take up to six weeks, once an allergen is eliminated from mom’s diet, to completely clear.
- Does it feel like you’re wrestling a baby alligator every time? If you are dealing with a wiggle worm situation, check out how to create a DIY diaper distraction station here!
Thanks for stopping by, mama. If you liked this article, I would so appreciate you sharing it with another mama! Thank you!
Until next time,


